5.00
(1 Rating)
advance course
About Course
Basic course Link – https://swingnawod.com/courses/trading-course-a-to-z/
Whatsapp Group – https://chat.whatsapp.com/DdiGfWW6TUx1Fc3LKUgTaW
Members profits card Group Link – https://t.me/+ozPIeQDzTa41ZWE1
Website එක හරහා Join වෙන්න දන්නේ නැති අය Whatsapp button එක click කරලා msg එකක් දාලා Join වෙන්න . – https://api.whatsapp.com/send?phone=94740850932&text=Hi%20Swing%20Nawod
PNL report
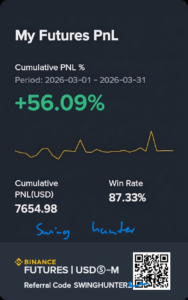
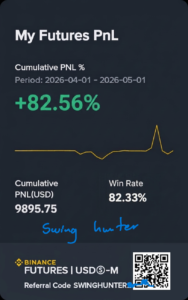
Course Content
☠️ ADVANCED COURSE — SMC / MSNR / YLSR
-
|| How to reset Password ( Swingnawod.com)
00:00 -
About Advance course
02:20
Module 09 — Market Structure & Liquidity
-
61: How to Define Trend — Uptrend vs Downtrend
12:57 -
62: How to Identify Swing Points
06:03 -
63: How to Identify BOS & MSS — Break of Structure Explained
28:06 -
64: Inducement
14:16 -
65: How to Identify Liquidity Sweep
07:55 -
67: Main Market Liquidity Points Explained
11:31 -
68: Story Lines
14:52 -
69: Story Lines Part 02
33:38 -
663: Market Liquidity Models
Module 10 — POI Concepts
-
70: Points of Interest (POI) & Fair Value Gap (FVG) Explained
13:49 -
71: POI & Inverse Fair Value Gap (IFVG) Explained
09:20 -
72: POI – BPR – Breaker Block
07:27 -
73: POI – OB – Order Block
12:08 -
74: POI – BB – Breaker Block
08:21 -
75: RB – Rejection Block
12:32 -
76: POI – Voleq – Volume Equal
12:40 -
77: Fair Valuation
-
78: Single Candle Mitigation
Module 11 — MSNR Concepts
-
79: MSNR Start — Support & Resistance Basics
-
80: SBR (Support Becomes Resistance)
-
81: RBS — Resistance Becomes Support
-
82: MSNR Fresh Levels
-
83: QM
-
84: Trend Lines
-
85: Trend Lines Part 02
-
86: Trend Line Manipulation
-
87: Indecision Pattern
-
88: CISD
Module 12 — HTF Bias Concepts
-
89: HTF BIAS
-
90: BIAS Key Point Part 02
-
91: HTF BIAS H/L 03
-
92: HTF BIAS S/R 04
-
93: HTF BIAS S/R Part 02
-
94: HTF BIAS FVGs 06
-
95: Opening Prices
-
96: How to Use Bias 01
Module 13 — Delta & Volume Concepts
-
97: Delta Introduction
-
98: Delta Absorption
-
99: Delta Exhaustion
-
100: Absorption and Exhaustion 02
-
101: Absorption and Exhaustion 03
-
102: Volume Vs Trend
-
103: Volume Profile 01
-
104: Volume Profile 02
-
105: FRVP Shapes 01
-
106: FRVP Shapes 02
-
107: FRVP Shapes 03
-
108: FRVP Shapes 04
-
109: Value Migration / Exploration Part 01
-
110: Value Migration and POC Shifting
Module 14 — Entry Systems & Strategies
-
111: Entry Setup Part 01
-
112: Entry Setup Part 02
-
113: Entry Setup Part 03
-
114: Swing Sweep Strategy
-
115: Intraday Strategy Part 01
-
116: Intraday Strategy Part 02
-
117: Continuation Strategy Part 01
-
118: Continuation Strategy Part 02
-
119: Confluence For High Probable Key Level
-
120: Key Level Refining
Module 15 — Advanced Tools
-
121: FIB Tool
-
122: VWAP Part 01
-
123: VWAP Part 02
-
124: VWAP Part 03
-
125: What Is AMT
Module 16 — Professional Execution
-
126: How to Select a Coin Pair
-
127: How to Plan Entries
-
128: How to Calculate SL and Leverage
Module 17 – 📈 Mindset of a Profitable Trader
-
53 : 📋 Trading Plan Creation
-
54 : 🧠 Managing Emotions
-
55 : 🚫 Avoiding Overtrading
-
56 : 🚫 How to Stop Revenge Trading
-
57 : ⚠️ Risk Management
-
58 : 🎯 Discipline & Patience
-
59 : 🏆 Consistency & Mindset
-
60 : 🧠 Mindset of a Profitable Trader
Module 18 – YLSR
-
129 : What is YLSR
-
130 : YLSR Scalp Strategy part 01
-
131 : YLSR Scalp Strategy part 02
-
132 : YLSR Scalp Strategy part 03
-
133 : YLSR swing Strategy part 01
-
134: YLSR swing Strategy part 02